Introduction
The processes for creating either a website or a Family Tree CD/DVD within Family Historian are essentially the same, and are well documented in the Help file. This article complements the Help file by highlighting key features that are often overlooked.
See Member Websites for examples of websites built using Family Historian.Version 7
The ƒh Publish > Websites & Family Tree CD/DVDs… command wizard builds both Website and CD/DVD browser packages and supports multiple alternative packages. The initial dialogue allows the packages to be managed.
The output is saved in the Project data ….fh_data\Packages\ subfolder. A further subfolder holds each named package, which holds the settings for the package and a \data files\ subfolder for the browser files.
Important note: You can only create a website using ƒh within the context of a project; it will not work for a standalone Gedcom file.
Versions 5 and 6
The two Family Historian features Publish > Make a Family Tree CD/DVD and Publish > Create a Website are almost identical
Make a Family Tree CD/DVD places its output in the Project …\Public\FH CD-DVD\ folder for burning to a CD/DVD. This includes autorun.inf and load.exe and start.html files, and a \data\ subfolder holding all the other files.
Create a Website places all its files directly in the Project …\Public\FH Website\ folder for uploading to a website.
Important note: You can only create a website using ƒh within the context of a project; it will not work for a standalone Gedcom file.
Version 4
The two Family Historian options Tools > Make a Family Tree CD and Internet > Create a Website are almost identical but they store their output in different places.
Make a Family Tree CD places its output in the Project …\Public\FH CD\ folder for burning to a CD. This includes autorun.inf and start.exe files, and a \data\ subfolder holding all the other files.
Create a Website places all its files directly in the Project …\Public\FH Web Page\ folder for uploading to a website.
Family Tree Wizard ~ Step 1 – Choose Privacy Options
The policy you adopt for privacy depends on the target audience for your information. A CD/DVD may not be widely distributed, whereas a website may be accessible worldwide. So when creating a website, it is usually advisable to hide all information, except possibly for basic details, about people who are still alive.
Advice
Initially the default settings should be used until a clearer understanding of what details need to be hidden has been established.
It is important to set the Private Flag and Living Flag on all appropriate Individual RecordsEvery person in your tree will have a single Individual Record, which holds all the information about that individual that you have entered. You can view and edit Individual records in the Property Box Dialogue. creating a website or CD/DVD. Otherwise it will not be possible to make use of these important options.
The article on how to Delete Data For Living People suggests ways of setting the Private and Living Flags on Individual Records, and other more advanced processes for achieving your privacy policy.
Family Tree Wizard ~ Step 2 – Select Featured Individuals
Each selected Individual will be featured on the CD/DVD or Website either with their own page, or a page shared with their spouse, unless their inclusion would violate the Privacy Options you defined at Step 1. You will get a warning message about Records excluded by your Privacy Policy.
Advice
Either Add All records or Select those required. The selection can be performed on an ad hoc basis, but if the data needs to be reconstructed from time to time, then it is recommended that a QueryQuerying is a very powerful feature that allows you to specify and save criteria for identifying a set of records of a given record type. or a Named ListNamed Lists are a way in FH to group related items — which can be records of any type(s) — so that you can easily find them to work with. is used to ensure the same criteria are used each time.
During initial experiments, only add a few representative individuals, otherwise the time taken to create the output may become excessive.
Family Tree Wizard ~ Step 3 – Choose Report Template
The Primary Page Type report template determines whether Individuals have their own page, or share a page with their spouse. If an Individual Report type is chosen then each Individual has their own page. If a Family Report type is chosen then couples share a page. In this case a Secondary Page Type report template must be chosen for unmarried Individuals with no Spouse Family Record.


Advice
The Individual Summary Report (for Web, CD or DVD) (V5&V6) /(for Web or CD) (V4) and the Family Group Sheet (for Web, CD or DVD) (V5&V6) / (for Web or CD) (V3&V4) are meant for use as these templates, but any listed report may be used. If you intend to produce various CD/DVD or Websites with different report options, then create a Custom Report Type for each option.
Report Options
- A convenient way to adjust Report Options is to use the Publish command (Reports in V4) to display the Report before using a Wizard. Select the desired Options, then use Save Report As and select Web Page (HTML), and view the new web page HTML Report in a web browser such as Internet Explorer or Mozilla Firefox. When the settings are satisfactory, use Save Report As > Custom Report Type, and use that Custom Report as the chosen report template.
- See the Report Content, Media, Format and Layout advice on customising Report Options. In particular, study the Pictures and SourcesSource: "where information was found". This could be anything from an archive in a county records office, a book, or even a relative's recorded recollection. Citing your Sources helps to show how you reached a particular conclusion about an Individual. tab options for displaying and enlarging MultimediaWhen you add a picture, video, sound recording, document file etc into a Family Historian project, a Media record is created to represent that media item within the project; the Media record includes a link to the actual Media file. images. Note that the Privacy tab duplicates the Family Tree Wizard ~ Step 1 – Choose Privacy Options and can be ignored.
- Some Report Options, such as Picture Gaps, Page Layout, and V4 Format Fonts, do NOT affect HTML Reports, so the Family Tree Tips ~ Alter CSS Default Styles technique must be used.
- A popular website feature allows an image thumbnail to be clicked in order to obtain a larger popup version. Family Historian V4 does not offer this feature.
Family Tree Wizard ~ Step 4 – Add Items for Table of Contents
The home page has a Table of Contents that provides hyperlinks to a variety of items. It can include Links to featured individuals, any style of Report, any type of Image including Diagrams, any file to Download, and the Index.
Advice
Remember that each option can be selected as many times as you like to add different versions of the same type of item.
- Link to page adds a hyperlink to the page of any featured individual, or their family couple.
- Image adds a hyperlink to any Photographic Image or any Family Historian Diagram saved in JPEG File (.jpg), GIF File (.gif), PNG File (.png), or any other web compatible graphics file format.
- Download adds a hyperlink to any downloadable file such as a copy of your GEDCOMGEDCOM, an acronym for GEnealogical Data COMmunication, is a specification for exchanging genealogical data between different genealogy software. It is a file format that most genealogical programs and online trees recognise. file, or a compressed ZIP file of your ProjectA Project is a Windows folder, created by Family Historian, which contains all your Family Tree information recorded in Family Historian. Normally located in the Documents\Family Historian Projects folder. Folder, or any Family Historian Report/Diagram in PDFThe Portable Document Format (PDF) is a file format developed by Adobe to present documents in their original formatting, independent of software, hardware, and operating systems. PDF files can contain text, graphics, links, and buttons, form fields, audio, video, and File (.pdf) format. The Family Tree Tips ~ Diagram Hyperlinks PDF article explains how to create a Family Historian Diagram in PDF, where each Individual box has a hyperlink to the Individual’s page to assist with navigation.
- Link to website adds a hyperlink to any Internet Website URL.
- Report adds a hyperlink to any Family Historian Report selected from the list, including any Custom Report, which will be created in HTML format. Remove the tick from Show most commonly-used reports to list all Reports.
- Index adds a duplicate of the Index hyperlink at the head of every page.
Example Home Page
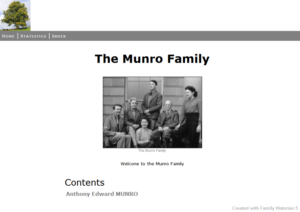
Family Tree Wizard ~ Step 5 – Create Home Page
This defines other Home Page details that appear above the Table of Contents such as a Picture and Welcome Text (as shown in the previous step).
Advice
The Home Page Picture can be any family photograph or other suitable image file in .jpg, .jpeg, .gif, or .png format.
Versions 5 & 6
The Picture Size option allows the size of the image to be selected.
Version 4
There are some corrections needed in the home page HTML otherwise the Picture is much too large. After completing Family Tree Wizard ~ Step 8 – Final Details, use a plain text editor to make changes about halfway down the index.html file as follows:
width=”50px”becomeswidth=”50”to correct a syntax error.<img src=becomes<img width=”300” src=or any other numerical value for the width of the Home Page Picture.
Family Tree Wizard ~ Step 6 – Additional Pages
This step allows an optional Contact Page and/or Statistics page to be added.


Family Tree Wizard ~ Step 7 – Presentation and Behaviour
This step adjusts the text of the header on each page, and the colours for the background, the text, and hyperlinks.
Advice
Click on the Colours button to select alternative text and background colours. For example, Menu Bar affects the broad toolbar across the top of each page, whereas Link and Link (cursor over) affect hyperlinks such as the names of Individuals.
Most text Fonts and Styles are determined by the Primary Page Type report template from Family Tree Wizard ~ Step 3 – Choose Report Template. However, some title and header text styles can only be altered by editing the fhstyle.css Cascading Style Sheet file as explained in Family Tree Tips ~ Alter CSS Default Styles.
Versions 5 & 6 Popup Picture Options
These options select the behaviour when a user clicks on Multimedia images in featured Individual or Family web pages. Various styles and sizes of popup or web page images are supported. See the Help for details.
In ƒh V5, if the None option is chosen, clicking on Multimedia images in web pages causes the browser to report Webpage/File Not Found, but a workaround is described in Forum posting This webpage has not been found. This problem is fixed in ƒh V6.
Family Tree Wizard ~ Step 8 – Final Details
Advice
The Advanced button allows snippets of HTML code to be added to every page. See Family Tree Tips below for more.
Click Finish to create the output files in the selected folder.
When complete either select View Website to open it in your default browser, or Close Wizard.
Tips and Tricks
In ƒh6 and later the Improve Website or CD DVD HTML pluginPlugins are small programs that allow new features to be added without upgrading Family Historian itself; some plugins are written by Calico Pie and others are written by users. offers many features to enhance the web pages created by ƒh.
HTML Tips and Tricks
A particular snag is that ƒh V4 produces poorly formatted HTML, which is awkward to edit with a plain text editor.
ƒh6 and later produce much tidier HTML files and uses a Cascading Style Sheet CSS file.
The following may be useful if you want to fine-tune your website in V4, or the Improve Website or CD DVD HTML plugin doesn’t do what you need.
- Set Page Background ~ Set a background image or an alternative colour to white on every page.
- Alter CSS Default Styles ~ Define alternative font face or colour and other styles on every page.
- Diagram Hyperlinks PDF ~ Create a PDF Diagram with a Hyperlink per Box that links to a featured Individual page.
- Text Field URL Hyperlinks ~ Convert all Text Field URL into Hyperlinks that open in a new web page.
All the features described here, together with a few others, are illustrated on the TATE & SCOTT Family Tree website.