Introduction
You may run into problems saving even medium size diagrams or ones with a high zoom level. This article describes some ways of dealing with this.
Issues with saving a single-page PDF and the solutions are described at Single Page PDF of a Diagram.
PNG (Or Other Image Formats)
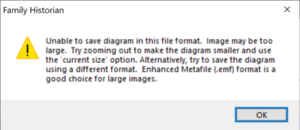
You may get this dialog:
or you may just want to have more control. Below are several options you can try. They can likely be modified for other image formats, but PNG is used here.
Print with a PDF Creator that Also Saves Images
PDF Creator will also save PNG and other formats instead of PDF. It avoids the issues with saving via Diagram > Save As… in ƒh. How to use PDFCreator to create a PDF is described at Single Page PDF of a Diagram. Follow those instructions, but in the save dialogs that come when printing, choose PNG instead of PDF.
Note that you should use File > Print Setup to set up the pages, and check that they are what you want using File > Print Preview before printing with File > Print. You may have to move the diagram around to get it in a single page.
By default the dpi will be 150. You can change this by editing the profile under the Profiles tab in PDFCreator. Change the one for Convert.
This method has been used to get 300 dpi PNG images of 16′ diagrams. There may be a limit of 200″. It should work for smaller diagrams, and gives you more control of your output image than the options in Family Historian.
Extract the Image from a PDF
You can in general extract an image from a PDF, such as those created by Family Historian PDF or the PDF tools described in Single Page PDF of a Diagram. This page describes one way to do that using GhostScript.
GhostScript
You must install GhostScript from Ghostscript for Windows (32 bit). The following was done with an old version of GhostScript. The details may have to be changed for a newer version.
The command line is
C:\Program Files\gs\gs9.20\bin\gswin64c -dNOPAUSE -dBATCH -r<resolution> -sDEVICE=png16m -sOutputFile="<your-output-file-name> <your-pdf-file-name>"
Use the path to GhostScript appropriate for the version you have installed. Use 300 for the resolution unless you have reason to use something else. Specifying a higher resolution than is in the PDF will not be useful.
In my case I wrapped the GhostScript command in a C# console app. The reason is that you can use the Open With menu in File Explorer on a PDF file, and it will then appear in the Open With menu next time, making it easy to use. I use C# as it makes a .exe and appears more attractive in the Open With menu. You could just as well use a BAT file, PowerShell script, Java JAR, or other. In those cases the file extension appears in the Open With menu.
My C# application can be found at https://github.com/KennethEvans/VS-ConvertPdfToImage. The GhostScript location and output directory is hard-coded and would need to be changed.
I have used this program for many years for other uses and it seems to work. The heavy lifting is done by GhostScript, of course, not my application, which is very simple.
[Written by Kenneth Evans]